Hi All,
Recently, I was involved
in a project for a 3d visualisation company called The Visualiser.
The initial brief from the client was to create an exquisite high rise building, with a specific pattern throughout its external surface.
After having exhausted all options while trying different techniques and using alternative applications such as Zbrush, AutoCAD, etc; we've finally decided to outsource the 3d modelling to an external company renown for creating complex 3d models, very quickly!
Few days later, they've returned back to us with the
disappointing news that, after having tried numerous techniques/approaches,
they simply wouldn't be able to deliver on their original promise.
The shocking news left us with no option but to look for an
alternative solution, immediately!
With the invaluable help of an outstanding senior artist by the name of Vempalle Sudhakar, we were able to create and visualise the building accurately, and according
to the client's specific requirements.
The complex building patterns were accurately created, by
using an outstanding plug-in called VRayPattern.
This easy to use plug-in allowed us to quickly create one
set of pattern in 3d, to be later wrapped around the organic shaped building
structure.
While the VrayPattern plug-in can be used in a variety of
different ways, and for numerous purposes, we've quickly achieved our results
by doing the following:
1-We've begun by first importing a specific AutoCAD pattern supplied by the client
2-This AutoCAD
drawing was used as the basis to create the exquisite building patterns.
Before introducing the VrayPattern, users are required to
first create the relevant pattern and the building shape, in 3d.
In addition, it's worth noting that, the 3d pattern needs to
be smooth enough to fit the building structure accurately.
a- We've started by creating a 3d plane and setting its
"Length and Width segments" to about 100.
Please note that, the value
of 100 worked well for the amount of smoothness required.
However, feel free to
use different values, if necessary.
b-Next, we've begun recreating the circled patterns using
the "circle" shape.
While increasing the "steps" value improves the
quality of a surface, it will not affect the display or the rendering performance.
The subsequent shapes were created by simply unticking the “Start
New Shape" function, and creating new circle shapes.
The shape was later extruded and booleaned against the plane created
earlier.
4- Once the building pattern was created, we've used some of
the drawing splines to create the organic building shape/shell.
It was achieved, by first selecting one of the drawing's
splines/shapes, followed by opening the "Modify" panel.
Next, we've enabled the "Cross Section" function
and selected/attached each relevant building spline in a "top to bottom"
sequential order.
To exit adding/attaching splines simply right click.
To finalize the building shape/shell, we've simply applied a
surface modifier on top.
Note how the building gradually decreases in size, from top to bottom.
5- The final stage was to create and wrap the exquisite building
pattern, with the help of
"VrayPattern" plug-in.
a- In the "Geometry" command panel, we've opened
its dropdown list and selected the "Vray" command from its list.
b-In the "Object Type" group, we've selected the
"VrayPattern" function, followed by clicking and dragging/scaling its
icon in the viewport to create it.
c- While the "VrayPattern" was still selected,
we've opened its "Modify" panel.
In the "Base parameters" group, we've enabled the
“in the scene” function, followed by selecting the previously created
"plane008" in the scene viewport. A gizmo should immediately appear around the "plane008" pattern/shape.
b- In the "Surface" group, we've picked the
building surface/shell, previously created.
It's worth mentioning that, the "Pattern" (i.e.
plane008) works like a tiled bitmap over the "Surface" (i.e.
line003). For this reason, users are required to apply a "UVW Map"
modifier onto the "Surface"(i.e. line003).
For this project the mapping parameters depicted in the
image below worked best. However, users are often required to tweak with its values
(quick test renders) to achieve the desired results.
Furthermore, the "UVW Map" length and width values
need to be entered in the "VrayPattern" crop size values.
Note: By default, the colour/ material of the
rendered building with the pattern, comes from the "VrayPattern" icon
in the scene. To change this, simply apply a nice Vray material to the "VrayPattern"
icon in the scene.
For this project, we've applied a nice Vray metallic finish
to it.
Moreover, it's worth noting that, the Vray pattered building
cannot be converted into a mesh. Therefore, any changes/tweaks need to occur on
"Surface" and/or "pattern" level.
For more information about its easy to use parameters and
installation process, please visit the following page:
The circled window details (i.e. circled frames) were
created by using some of the techniques covered earlier.
Finally,the remaining building details were physically modelled on
top of the building itself (i.e. Line003).
Please see below the complete rendered image, with
lights and other features.
I hope you like the final result:
Video Captions available (CC)
Video Captions available (CC)
Video Captions available (CC)
Video Captions available (CC)
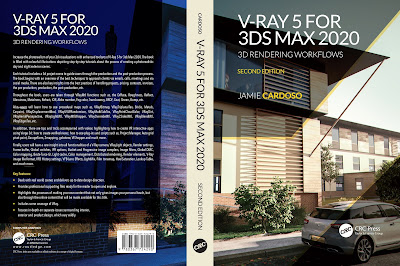
Finally, I have just published a New Book with Taylor & Francis/CRC Press, entitled,
V-Ray 5 for 3ds Max 2020: 3D Rendering Workflows
Click on the image below to find out more about my new book.
 |
| Course 1: Exterior Daylight with V-Ray + 3ds Max + Photoshop |
 |
| Course 2: Exterior Night with V-Ray + 3ds Max + Photoshop Course 3: VRay 3ds Max Interior Rendering Tutorials |
 |
| Course 4: Interior Daylight with V-Ray + 3ds Max + Photoshop |
 |
| Course 5: Interior Night with V-Ray + 3ds Max + Photoshop |
 |
| Course 7: Planning Applications for Verified Views |
 | |
| Course 8: 3d People + 3ds Max + VRay + Photoshop |
Also, please Join my Patreon page or Gumroad page to download Courses; Project files; Watch more Videos and receive Technical Support. Finally, check my New channels below:
3d Rendering: Is the process of converting the three dimensional (3D) data seen in a 3d scene into 2D image/s (rasterized).
The rasterization process include, the rendering parameters, the rendering engine, lights, 3d models, textures, shaders, and other effects.
3D renders can be a sequence of animated objects/effects/cameras, or a single frame with a still camera and object/s.
Some of the articles, Videos and Tutorials depicted here will take you through the process of rendering.
Photorealistic Rendering: Is the Process or Art of making a typical Computer Generated Image/render (CGI) look indistinguishable from a real photo.
To achieve this, users often need to possess the skills and the"eye" to appreciate good photography, cameras, composition, lighting, shaders, materials, 3d modelling, rendering and have some post-production skills.
Some of the articles, Videos and Tutorials depicted here will help you achieve truly photorealistic renderings.
Post-Production: Is the process of creating effects or/and results after/post the main process.
This terminology can be used to describe the results (post-production) of main processes such as 3d renderings and/or filming a scene.
The post-production often takes place in applications such as Photoshop, After Effects, Nuke, etc.
Some of the articles, Videos and Tutorials depicted here will take you through the process.
Architectural Rendering, or architectural illustration/Visualization, is the art/process of creating two-dimensional images or animations depicting the attributes of an architectural design, while using state of the art applications such as, Autocad, 3ds max, VRay, Cinema 4d, Blender, Maya, Corona, Photoshop, etc
Some of the articles, Videos and Tutorials depicted here will take you through this amazing process.
Textures: Is a term often used to describe photographed 2d images to be later used in a toggle of a shader or procedural map.
Textures can be used in the Diffuse toggle, Reflect, Glossy effects, Bump, Displacement, etc.
Some of the articles, Videos and Tutorials depicted here will take you through the process of applying textures.
Materials: Is a term often used to describe maps, textures,procedural maps or shaders, depending on the context the term is being used.
Some of the articles, Videos and Tutorials depicted here will take you through the process of applying materials.
Procedural materials: Is a term often used to describe maps with editable/proprietary parameters/functions.
Some of the articles, Videos and Tutorials depicted here will take you through the process of applying procedural materials.
Shaders: Is a term often used to describe complex materials with functions and procedural maps created for a specific purpose.
Some of the articles, Videos and Tutorials depicted here will take you through the process of applying shaders.
Architectural Rendering, or architectural illustration/Visualization, is the art/process of creating two-dimensional images or animations depicting the attributes of an architectural design, while using state of the art applications such as, Autocad, 3ds max, VRay, Cinema 4d, Blender, Maya, Corona, Photoshop, etc
Some of the articles, Videos and Tutorials depicted here will take you through this amazing process.
Studio Lights: They are fundamental in the process of creating appealing images/renders.
Lighting determines not only the brightness and darkness, but also the tone, mood and the atmosphere of a scene.
Hence the importance to control and manipulate the lights accordingly, in order to fully capture the textures and the vibrancy of your objects.
By distributing the shadows and the highlights accurately, you can achieve truly appealing images/renders.
V-Ray: Is a rendering engine that uses global illumination
algorithms, including path tracing, photon mapping, irradiance maps and
directly computed global illumination.
Furthermore, it is used as a commercial plug-in for
third-party 3D computer graphics software applications such as 3ds max, Maya, Houdini, Blender, Nuke, etc, for
visualizations and computer graphics in industries such as media,
entertainment, film and video game production, industrial design, product
design and architecture.
3ds Max: Autodesk 3ds Max, formerly 3D Studio and 3D Studio Max, is a
professional 3D computer graphics program designed to create 3D animations,
models, games and images.
In addition, it has modelling, animation and movie effects
capabilities, frequently used by video game developers, TV commercial studios
and architectural visualization studios.
3ds Max also features shaders, dynamic simulations, particle
systems, plug-ins, and much more, with its own scripting language.
Adobe Photoshop: Photoshop is a powerful raster based graphics program produced by the Adobe Corporation.
It
is widely used for a variety of photo/image editing purposes worldwide.
The program has a huge number of filters, functions, plug-ins, scripts,
etc.In addition, there is a huge online support for this software, and countless online sites with tips and tutorials.
Finally, there are readily available books, online/college courses, and its full documentation at Adobe.com
VRayPattern
Autodesk/3ds max
New Book: 3D Photorealistic Rendering: Interiors & Exteriors with V-Ray and 3ds Max
New Book: 3D Photorealistic Rendering: Interiors & Exteriors with V-Ray and 3ds Max
Tips & Tricks for VRay & mental ray
Creating Customised IES lights
Realistic materials
Creating a velvet/suede material
FoxRenderfarm
www.arroway-textures.com
Renderpeople
Gobotree
.


wow, the pattern following around the corners is quite smooth indeed.
ReplyDeleteDo you know of any plugins like this for other renderers?
Hi Retort,
ReplyDeleteThank you very much for your feedback here. It's much appreciated!
No, I have not yet seen any similar plug-ins for other rendering engines.
However, I'll make a quick web search to find out!
Thanks again!
Jamie
Couldn'y you just use Patch Deform after you've modeled and booleaned the facade?
ReplyDeleteVuk
Hi Djordjevic,
ReplyDeleteThank you very much for your feedback here. It's much appreciated!
Vempalle Sudhakar tried your above suggestion; and unfortunately, it didn't work as well as the client had wished (i.e. very smooth curves/edges). Especially on the curved areas of the building!
Vempalle Sudhakar even went as far as to use Zbrush's accurate displacement maps...and still, the edges of the curved areas were NOT smooth enough to be signed off by the client( i.e. jagged/artifacts)!
Yes, VRayPattern was our last/winning option!
Thank you again, for your input here. It's much appreciated!
Kind Regards,
Jamie
Hi Jamie,
ReplyDeleteWe'v done alot of parametric facade design using this tool. If you had that problem then it could have been a problem with the surface you were paneling or the line>cross-saction>surface geometry. Usually if the topology of that surface is bad and that can be checked if you apply an edit poly over surface to it, patch deform doesn't work well and starts braking things and bits.
But anyway nice project and nice approach!
Regards,
Vuk