

Hi All,
The above image is part of a project I have finished for a client recently. The final 3ds files were produced in two versions: for mental ray and VRay.
However, the techniques described here can easily be implemented across a variety of 3d applications and rendering engines.
It's worth noting that, the 98 page manual only has the interior 3ds Max scene seen on the cover; and was published by, CreateSpace Independent Publishing Platform (an Amazon.com publishing company).
The Pre-production and Post-production chapters do not require any rendering engine.
However, the screen grab settings for production chapters are in mental ray.
If it's any consolation, there are two 3ds max scene projects: VRay and mental ray.
Finally, I have new book coming out, just for VRay:
3D Photorealistic Rendering: Interiors & Exteriors with V-Ray and 3ds Max
There's a blog post about it here:
http://jamiecardoso-mentalray.blogspot.cz/2013/04/3d-photorealistic-rendering-interiors.html
The main brief was to create an image that could sell the space to potential clients.
These types of marketing images are quite popular within the professional visualisation industry.
As such, I took the usual path of following meticulously three main steps:
1-Pre-production: This vital preliminary step consisted in taking the brief from the client. In this brief, they came up with their drawings and sketchy ideas.
I then took all the information on board; did some heavy R & D based on their original brief and presented them with a mood board depicting my vision of the art direction.
This mood board led to another brainstorming session between me and the client, which culminated into a final mood board that we both liked (i.e. final collage).
It was vital for me to signoff this crucial stage of the project to prevent changing the course of the art direction at later stage, and to ensure that we both had a clear idea of the final result.

2-Production: Having gone through the pre-production process and considered some of the artistic and technical approaches available, I began applying the shaders and textures. All shaders and textures were based on real photo references supplied by the client and sourced by me during the R&D process. I have carefully ensured that the scene had interesting reflections (i.e. plain and diffused); highlights from the sunlight and from artificial lights; direct and diffused shadows; glossy highlights from materials (plain and diffused) and the correct bump values on materials.

The following process was to begin lighting the scene carefully.
By that, I first introduced the daylight system to set the sunlight direction and its shadows in the scene. As guide,I have used references from photos of the agreed mood board.

Next, I began adding the artificial ceiling lights. There was a quick test render of each artificial light created (i.e. with a plain non reflective white OVERRIDE material).This was to prevent the scene from quickly becoming "bleached out" with too many lights.
Each artificial light had soft shadows.
I had also ensured that, there was a clear definition between lit and dark areas in the scene in order to create depth.

Once I was fairly satisfied with the overall lighting, I had disabled the material override for the final big size region renders.
The final image Size was rendered at 4000x3000 pixels.
I had produced the renders for mental ray & V-Ray.

3-Post production: This process is arguably the most important stage towards signing off a project. All previous stages and the technical decisions will culminate into this final process.
Effects such as vignetting, depth of field, glow/glare, grain, colour correction, etc, are often applied and tweaked in post. Mostly due to these effects being under more scrutiny by clients.

While it's possible to implement all these effects directly from 3Ds Max, applying these affects in post increases the work efficiency when matching the photo reference closely. It will also provide more flexibility to add or omit such effects if or when necessary.

The above mentioned workflow allowed me to produce the final renders within the allocated time and budget, while using different platforms and rendering engines to achieve one result.
For the next few weeks, I will continue posting only key sections of a manual entitled: 3D Realism: Practical & easy Workflows.
This new and unique manual is aimed at intermediate and advanced users who may or may not be familiar with rendering engines and wish to consistently/repeatedly produce high end marketing renders while implementing 3 simple steps: Pre-Production, Production and Post-Production.
*This manual is lavishly illustrated with step-by-step tutorials and it is filled with useful tips & tricks throughout as well as theories and analyses of each technique implemented.
*The Project 3ds files are for VRay and mental ray.
*There is detailed process of preparing and importing external files; followed by modelling from 2D drawings.
*Robust Post-Production techniques to polish your renders.
*...and much, much more.
From the manual:
Section 1
Pre-Production:
1.1 Introduction
It’s common practice to establish from the start: the type of project involved; the target audience and the media platform/s in which the final product is to be showcased on.
Projects can range from a simple design exercise for a PDF/PowerPoint presentation; to high end marketing images for magazines, newspaper, billboards, TV, etc.
Design exercises or renders for PDF/PowerPoint documents, do not require the same level of expertise and precision as marketing images.
Marketing image gurus have in fact concluded that, it’s far more difficult to produce compelling images without a clear art direction (i.e. photo references; etc.)than otherwise.
The pre-production phase is designed to help the Studio/Artist and the client to establish the art direction prior to entering the production stage.
When failing to sign off this crucial stage (i.e. pre-production), the final product will be more likely to be exposed to criticism and constant reviews by the client.
Furthermore, it may subsequently result in “stretched” budgets and unfulfilled expectations by both: the client and the Artist/Studio.
The following tutorial will take you through the entire process of consistently producing captivating marketing images.
1.2 Research & Development
Creating prestigious marketing images often starts with the initial brief from the client describing their ideas, concepts, textures/finishes, design drafts, vision, photo reference, etc.

With all the information supplied, one should begin making preliminary decisions with regards to finding the best photo references to use for art direction, design possibilities, lighting, finishes, etc.
This process is considered be one of the most important stages of the pre-production, as the artist/s/studio will liaise directly with the client about the following:
1. The most relevant features of the project/design.
This will later prove crucial when setting up the cameras and the composition.
2. Find out the story behind the design/project. This may also play an important role in deciding:
The composition, the overall lighting rig/mood, the types of people to be added in post, and how people should interact with the space/shot, and with each other.
3. The media platform that the marketing image will be displayed on (i.e. Magazines, Billboards, TV, Newspaper, etc).
This process is fundamental when selecting the types photo references, as it will have a direct impact on the choice of the 3d contents, colour, camera position, render output size, etc.
4. Other alternative art directions. This process involves having numerous photo references representing other dynamic camera positions, composition, lighting, colours, colour scheme, materials/finishes, etc, that may benefit the final image.
As mentioned earlier, this is the stage where the artist/studio should source for numerous striking photo references relevant to the criteria (i.e. similar spaces, structures, design, media platform and ideas) to help the client decide the art direction- Mood Boards.
Most of these striking photos can easily be sourced from websites such as Flickr; Books; etc.

1.3 Camera & Composition
The following step is for the artist/studio to create draft/low poly 3d versions of the most relevant items of the 3d composition.
These should be based on sketches/drawings and photos supplied by the client. Alternatively, one can use the 3d model supplied, if available.

Next, one can start setting up the camera positions that encompass the relevant areas of the design, based on the previous information supplied, and the photo references sourced by the artist.
With help from the artist/studio, the client should sketch out the camera position/s, and the field of view (FOV); preferably on a 2d drawing print.

This is a good technique to quickly assess where the camera/s should be placed.
The camera position and its settings play a crucial role in producing the final render.
It is very important at this early stage to decide how one wants the final image to be interpreted through the camera lens (i.e. in an artistic, cinematic or standard photography manner).
Even untrained eyes can quickly assess whether or not an image is realistic, based on how the camera is positioned or setup.
The camera’s FOV (i.e. field of view) should reflect the values commonly used in real cameras, coupled with appropriate render output size to help capture the scene’s essence (portrait/landscape). The final result should be based on how well the camera, the scene and its contents complement each other in a dramatic and effective way.
Having the camera at eye level (i.e. 1.60m) or another realistic position is important for two main reasons:
1. Our eyes can easily spot odd camera positions (i.e. unusual height/position).
2. Having the camera at eye level will facilitate integrating people, and other objects in post.
At times, even accurate scenes may look disproportionate, as result of not having the camera at eye level.

Professionals often create the original camera type as “Target” to set its direction. Once that is done, the camera is then immediately changed to “Free Camera” type, for more flexibility in moving/rotating the camera in the viewport.


“Signing off” the shot/ composition also involves going backwards and forwards with the client, while deciding on the geometry that should be in the foreground and background.
1.4 Previewing the Art Direction
During the process of establishing the final art direction, you will be required to “Photoshop” elements such as photos, notes, sketches and other effects on top of the previously taken screen grab, or a draft render. The final result should be an artist’s impression, or a collage depicting the overall art direction of the final shot.
The entire exercise is designed to help the client quickly understand and preview the impact of their choices based on the design and the artistic decisions previously made.


It’s also worth mentioning that, while liaising with the client, one should be adventurous by trying to break the mould, and suggest new ideas and effects such as:
*Vignetting
*Subtle surface discrepancies
*Chromatic aberration (…this is the one effect that you should not mention to the client, but simply add it in a very subtle manner).
*Depth of field (it is mostly relevant when there are objects in the foreground).
*Glow
*Lens Flare
*Dynamic camera positions
*ETC
All the above mentioned steps will aid the client when reviewing the overall budget and the final art direction.
It will also help avoid the usual project constraints related to lighting, composition, textures/finishes; final quality, etc.
As mentioned earlier this article is just a small section of my latest manual.
For this manual, while a 3d software and a rendering engine had to be chosen as a platform; the majority of its content focuses mainly on workflows and general methodologies used by most reputable studios. These techniques can easily be implemented across a variety of 3d applications and rendering engines.
The image depicted below is one of many which proved to be remarkable. I have produced them while using 3Ds Max and VRay, for a client.
.

I hope you have found this post interesting.
Video Captions available (CC)
Video Captions available (CC)
Video Captions available (CC)
Video Captions available (CC)


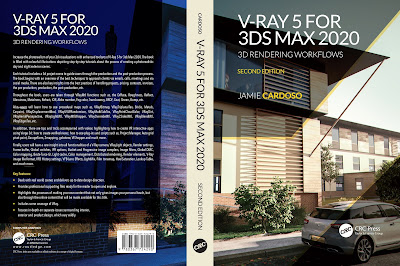
Finally, I have just published a New Book with Taylor & Francis/CRC Press, entitled,
V-Ray 5 for 3ds Max 2020: 3D Rendering Workflows
Click on the image below to find out more about my new book.
Checkout below my other Courses with High Resolution Videos, 3d Project files and Textures included.
Also, please Join my Patreon page or Gumroad page to download Courses; Project files; Watch more Videos and receive Technical Support. Finally, check my New channels below:


![]()


More tips and Tricks:
 |
Course 1: Exterior Daylight with V-Ray + 3ds Max + Photoshop  |
| Course 3: Exterior Night with V-Ray + 3ds Max + Photoshop |
| Course 4: Interior Daylight with V-Ray + 3ds Max + Photoshop |
 |
| Course 5: Interior Night with V-Ray + 3ds Max + Photoshop |
 |
| Course 6: Studio Lights with V-Ray + 3ds Max + Photoshop |
|


Also, please Join my Patreon page or Gumroad page to download Courses; Project files; Watch more Videos and receive Technical Support. Finally, check my New channels below:
More tips and Tricks:
Post-production techniques
Tips & tricks for architectural Visualisation: Part 1
Essential tips & tricks for VRay & mental ray
Photorealistic Rendering
Creating Customised IES lights
Realistic materials
Creating a velvet/suede material
FoxRenderfarm
www.arroway-textures.com
Renderpeople
Gobotree
.