

Photo Reference supplied by the client

My Final 3D Render
Hi All,
The above 3D visual is part of a project I have finished recently for a client.
Pre-Production: I was initially supplied with series of 2D drawings to build the model from (i.e. plans; sections and elevations).
Upon finishing the modelling, I have quickly begun taking screen grabs and greyscale renders to help the client sign off the model and decide on the camera view to go with.
Following that, I have asked the client to provide me photo/s of a similar retail space they have built in the past, in order for me to use as the basis of the art direction (i.e. photo reference).
Production: The photo reference/s played an important role throughout the process of creating shaders, textures, lighting and rendering.
Shading: I have used the photos supplied by the client to create shaders with specific properties (highlights, bevel, reflection, etc.).
Texturing: The texturing was quite straight forward as I have used a number of the material samples supplied by the client.
Lighting: In order to achieve depth in the scene, I have test rendered each light created and ensured they were reasonably distant from one another, to prevent “scorching” the scene.
The final result was a nice and balanced scene with clear definitions of bright and dark areas (i.e. Depth).
Rendering: I have carried out a number of high resolution region renders to ensure the final render was acceptable.
In addition, I have also enabled key render passes such as “VRayRawrefraction”, “VRayRawreflection”, “VRaySpecular”, “VRayExtraText” in conjunction with “VRayDirt”, “VRayWireColor”, etc.
I have chosen Vray as the main rendering engine because the client has asked me to.
However, I have also got the same 3D scene in mental ray.
Post-Production: This final stage consisted of blending all the elements previously rendered, and applying key adjustment layers such as: levels, curves, selective color, hue/saturation, etc.
To add the people, I have started by first incorporating a screen grab of the main camera view into my PSD file.
The screen grab had boxes in its camera viewport.
The boxes had the average height of most people; and they were to be used as references, for heights only.
The subsequent step was to begin adding real photos of people with diffused shadows, followed by scaling and correcting them while using some of the adjustment layers mentioned earlier.
Finally, I have used a bit of vignette and chromatic aberration to make the overall image more appealing.
Note: As with most clients, they wanted they design to be nice and bright; so I had to increase some of the curves and levels slightly.
This is one of numerous reasons a personally choose to have most effects in PSD layers.
The entire project took between two to three days to finish.
I would like to personally thank Scott, for helping me liaise with the main client about the overall colour, art direction, approving the 3d model, textures, shaders, etc.
The first image is the photo reference, and the second is the final 3D Render.
I hope you like the final result as much as the client did.
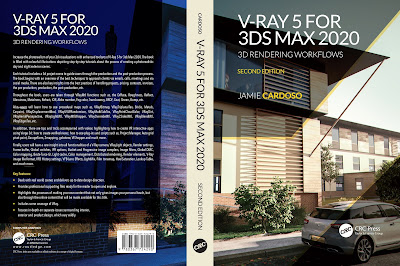
I have just published a New Book with Taylor & Francis/CRC Press, entitled,
V-Ray 5 for 3ds Max 2020: 3D Rendering Workflows
Click on the image below to find out more about my new book.
 |
Course 1: Exterior Daylight with V-Ray + 3ds Max + Photoshop  |
| Course 3: Exterior Night with V-Ray + 3ds Max + Photoshop |
| Course 4: Interior Daylight with V-Ray + 3ds Max + Photoshop |
 |
| Course 5: Interior Night with V-Ray + 3ds Max + Photoshop |

|


Also, please Join my Patreon page or Gumroad page to download Courses; Project files; Watch more Videos and receive Technical Support. Finally, check my New channels below:


Office Reception Rendering with VRay...and mental ray
More tips and Tricks:
Post-production techniques
Tips & tricks for architectural Visualisation: Part 1
Essential tips & tricks for VRay & mental ray
Photorealistic Rendering
Creating Customised IES lights
Realistic materials
Creating a velvet/suede material
FoxRenderfarm
www.arroway-textures.com
Renderpeople
Gobotree
.