Sunday, 2 December 2012

3ds max: Creating a “Velvet/Suede” finish with Vray or mental ray


                         Play with custom captions/subtitles

After few requests to post a tutorial about creating a velvet/suede fabric finish, I have managed to put something together.

The following tutorial works for both V-Ray and mental ray.

One of the most distinctive characteristics of the velvet/suede finish is its soft textured effect with two contrasts that transcend across the entire surface. This effect is more noticeable on the edges/rim of the surface.

Note: This tutorial assumes that, the user has already applied a base texture to the diffuse toggle.
To source for a good velvet/suede texture, simply Google (image search): velvet texture

Alternatively, to find seamless high resolution textures, simply visit: www.arroway-textures.com 
One should be able to find a nice high resolution texture under, suede category.


To emulate this material, simply do the following:


1- Go into your existing “Diffuse” map toggle first.

Or


2-In the “Diffuse map” parameters, click on its “Bitmap” toggle to access the “Falloff” procedural map from the “Material/Map Browser” dialog. Double click to select it.


3-The “Replace Map” dialog should be prompted. Choose to “Keep old map as sub-map” and “OK” to close the dialog. The “Falloff parameters” should be loaded.


4-With the “Falloff parameters” loaded, one can clearly see its exquisite effects from the material slot thumbnail.
The next phase is to create two variations of the same material in order to emulate the previously described “finish”.
The “Color Correction” procedural map is one of many tools that can help achieve that:

In the “Front: Side” group, click on the “Front” toggle to access its “Bitmap” parameters; followed by clicking on its “Bitmap” toggle to choose the “Color Correction” map from the “Material/Map Browser” dialog. Also, choose to “Keep old map as sub-map” option when the “Replace Map” dialog is prompted.


5- This procedural map offers a number of ways to control the texture. One of the most popular methods used by numerous companies is to scroll down to the “Lightness” rollout and enable the “Advanced” function.
Its parameters should come to life. Reduce its “Gamma/Contrast” “RGB” value to about 0.7 to darken its texture.

It's worth noting that, this value worked well for the desired effect. However, one can try different values, if desired.


6- The next step is to use the same procedural map for the “Side” toggle, with reversed effects (i.e. brighter texture).
To do so, simple go back to the “Falloff Parameters” by clicking on the “Go to Parent” button first. In the “Falloff Parameters”, drag the “Front” toggle contents and drop it onto the “Side” toggle.
The “Copy (instance) Map” dialog should be prompted; choose the “Copy” option and “OK” to close the dialog.
The “Copy” option was chosen because its parameters will be later changed.


7- Next, go inside the “Side” toggle and increase its “Gamma/ Contrast” value to about 2.0.

Please note that this value worked well for the intended results. However, feel free to try different values, if desired.


8-Finally, to ensure that the falloff is visible on the edges /rim of the surface, simply change its “Falloff Type” to “Fresnel” and render the results.


The two 3D renders below depict the “Before” and “After” effects  using the “Falloff” procedural map on the diffuse toggle.

I hope you have found this tutorial helpful!


                                NO "Falloff" procedural map being used


                                With "Falloff" procedural map being used


I hope you have found this article somehow useful!


                                                         Video Captions available (CC)


                                                      Video Captions available (CC)


                                                      Video Captions available (CC)


Video Captions available (CC)


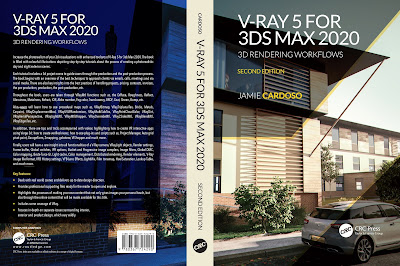
Finally, I have just published a New Book with Taylor & Francis/CRC Press, entitled,  

V-Ray 5 for 3ds Max 2020: 3D Rendering Workflows

 Click on the image below to find out more about my new book.


https://www.patreon.com/user?u=2469908  


New Book: 3D Photorealistic Rendering: Interiors & Exteriors with V-Ray and 3ds Max


More tips and Tricks:

Post-production techniques

Tips & tricks for architectural Visualisation: Part 1

Essential tips & tricks for VRay & mental ray

Photorealistic Rendering

Creating Customised IES lights

Realistic materials

FoxRenderfarm

www.arroway-textures.com 

Renderpeople

Gobotree


.

Saturday, 11 August 2012

3ds max: Retail Project_with VRay...and mental ray


Photo Reference supplied by the client


My Final 3D Render


Hi All,

The above 3D visual is part of a project I have finished recently for a client.

Pre-Production: I was initially supplied with series of 2D drawings to build the model from (i.e. plans; sections and elevations).

Upon finishing the modelling, I have quickly begun taking screen grabs and greyscale renders to help the client sign off the model and decide on the camera view to go with.

Following that, I have asked the client to provide me photo/s of a similar retail space they have built in the past, in order for me to use as the basis of the art direction (i.e. photo reference).


Production: The photo reference/s played an important role throughout the process of creating shaders, textures, lighting and rendering.

Shading: I have used the photos supplied by the client to create shaders with specific properties (highlights, bevel, reflection, etc.).

Texturing: The texturing was quite straight forward as I have used a number of the material samples supplied by the client.

Lighting: In order to achieve depth in the scene, I have test rendered each light created and ensured they were reasonably distant from one another, to prevent “scorching” the scene.

The final result was a nice and balanced scene with clear definitions of bright and dark areas (i.e. Depth).

Rendering: I have carried out a number of high resolution region renders to ensure the final render was acceptable.
In addition, I have also enabled key render passes such as “VRayRawrefraction”, “VRayRawreflection”, “VRaySpecular”, “VRayExtraText” in conjunction with “VRayDirt”, “VRayWireColor”, etc.


I have chosen Vray as the main rendering engine because the client has asked me to.
However, I have also got the same 3D scene in mental ray.


Post-Production: This final stage consisted of blending all the elements previously rendered, and applying key adjustment layers such as: levels, curves, selective color, hue/saturation, etc.

To add the people, I have started by first incorporating a screen grab of the main camera view into my PSD file.

The screen grab had boxes in its camera viewport.
The boxes had the average height of most people; and they were to be used as references, for heights only.

The subsequent step was to begin adding real photos of people with diffused shadows, followed by scaling and correcting them while using some of the adjustment layers mentioned earlier.

Finally, I have used a bit of vignette and chromatic aberration to make the overall image more appealing.

Note: As with most clients, they wanted they design to be nice and bright; so I had to increase some of the curves and levels slightly.

This is one of numerous reasons a personally choose to have most effects in PSD layers.

The entire project took between two to three days to finish.

I would like to personally thank Scott, for helping me liaise with the main client about the overall colour, art direction, approving the 3d model, textures, shaders, etc.

The first image is the photo reference, and the second is the final 3D Render. I hope you like the final result as much as the client did.


I have just published a New Book with Taylor & Francis/CRC Press, entitled,  

V-Ray 5 for 3ds Max 2020: 3D Rendering Workflows

 Click on the image below to find out more about my new book.


                                                         Video Captions available (CC)


                                                      Video Captions available (CC)


                                                      Video Captions available (CC)


For more step-by-step information about this workflow please check the following articles in this Blog:


Office Reception Rendering with VRay...and mental ray


I hope you have found this article somehow useful!


New Book: 3D Photorealistic Rendering: Interiors & Exteriors with V-Ray and 3ds Max


More tips and Tricks:

Post-production techniques

Tips & tricks for architectural Visualisation: Part 1

Essential tips & tricks for VRay & mental ray

Photorealistic Rendering

Creating Customised IES lights

Realistic materials

Creating a velvet/suede material 

FoxRenderfarm

www.arroway-textures.com 

Renderpeople

Gobotree


.