Often, imported AutoCad drawings lose their original colour once added into a new layer (using “Manage Layers” toolbar) in 3Ds Max.
This “glitch” usually frustrates numerous users for a number
of reasons, as colour coded drawings help to quickly understand the design and to easily “select
by colour” any given layer/s of the relevant drawing in the 3Ds Max scene.
After countless requests to post an article/tutorial on how to correct this problem, I have finally managed to put something together with help of a prolific script writer/ senior Visualiser/Photographer called David Venables.
After countless requests to post an article/tutorial on how to correct this problem, I have finally managed to put something together with help of a prolific script writer/ senior Visualiser/Photographer called David Venables.
David created a simple script to override the above mentioned problem!
I have had the pleasure to meet and continue to work with David
while at AVR London.
David Venables can also be contacted via LinkedIn Here.
Without further ado let us start by importing an AutoCAD file format (i.e. DWG) into 3Ds Max.
With the DWG file imported into Max, the next step is to
quickly create a simple script and apply it.
A- Click on the “MaxScript” button from the main toolbar,
and choose the “Maxscript Editor” from the dropdown list, to open its dialog
box.
B-Copy and paste the following text/script created by David, into
the text field of the “Maxscript Editor” dialog:
Fn
ColourFromLayer =
(
Local
SelectionArr = (selection as array)
Local
myarr = #()
for i
in SelectionArr do append myarr i.wirecolor
for i =
1 to SelectionArr.count do
(
SelectionArr[i].colorByLayer
= false
SelectionArr[i].wirecolor
= myarr[i]
)
)
The next step is to “Evaluate” the script.
A- To do so, first open the “MaxScript Listener” dialog by
pressing the “F11” key.
B-Next, select the “Maxscript Editor” dialog and press
“Ctrl+E” to evaluate the script for any possible errors. Alternatively, simply go
to “Tools” and choose the “Evaluate All” option from the dropdown list.
The “ColourFromLayer()” text should automatically appear in
the text field of the “MaxScript Listener” dialog…without any red text errors.
Following that, select the entire imported drawing with the
“Selection Region” tool.
To apply the script to the selected drawing, simply go to
the text field of the “MaxScript Listener” dialog; ensure that a blinking
vertical text bar is in front of the “ColourFromLayer()” text ,followed by
pressing “Enter”.
The “OK” text should appear, and the blinking vertical text
bar should automatically jump below it…without any red text errors.
This is an indication that the script had been applied
successfully.
To test whether or not the script will serve its purpose once
the drawing is added into a new layer, first open the “Manage Layers” dialog by
clicking on its button on the main toolbar.
While the drawing is still selected, create a new layer by
simply clicking on its button in the “Manage Layers…” dialog. Also, re-name the
layer.
The entire content of the drawing should now be part of the
newly created Layer, with the drawing’s original colours intact. Press "Ctrl+D" to unselect everything in the 3Ds
Max Scene.
If/when satisfied with the results, save the script by first
selecting, right clicking and copying the “ColourFromLayer()OK” text from the “MaxScript
Listener” dialog; followed by pasting it onto the “Maxscript Editor” dialog. Ensure
the newly pasted text is below the existent ones.
To quickly be able to deploy this script in future occasions,
users often run it off the Max quad menu or as a toolbar button.
Too add it as a toolbar button, simply click on “Customize” main
toolbar and choose the “Customize User Interface” option from the dropdown list.
Its dialog should open. Under the “Toolbars” tab, create a
new toolbar, by clicking on the “New” button.
In the “New Toolbar” dialog, name it accordingly and “OK” to close the dialog. A new toolbar button should automatically appear.
In the “New Toolbar” dialog, name it accordingly and “OK” to close the dialog. A new toolbar button should automatically appear.
With the new toolbar button created, one can now close the “Customize User Interface” dialog.
Next, we are going to drag and drop the previously created script
text in its entirety from the “Maxscript Editor” dialog into the newly created
toolbar button.
An image button should automatically appear in the newly created toolbar.
An image button should automatically appear in the newly created toolbar.
To edit its appearance, simply right click on its image and
choose to “Edit Button Appearance” from its pop up menu.
The “Edit Macro Button” dialog should open. By default it is set to “Image Button”.
One can change it to “Text Button” type and name the “Label”, as
well as the “Tooltip”. This action will allow users to see the name of the
script on the button, as opposed to the previous default “Image button”
Once satisfied, “OK” to close the dialog.
Place the newly created toolbar close to the others, by simply
clicking and holding on the top edge of its button; followed by dragging /placing
it adequately.
Finally, close and restart 3Ds Max. The newly created toolbar button should now be visible/part of the main toolbar.
To test whether the new toolbar is working or NOT, import a completely new drawing into 3Ds Max.
Select the entire drawing as previously done and apply the
script by simply clicking on the “ColourFromLayer” toolbar button created
earlier.
Next, reselect the entire drawing and add it to a completely new layer as previously done.
As one can see:The drawing's original colours remained intact when added into a new layer...which is a clear indication that the new toolbar button worked as expected!
Tip: Adding a “#” before the layer name will ensure the newly created layer always stays on top of the list.
I hope you have found this tutorial/article and the script useful.
Video Captions available (CC)
Video Captions available (CC)
Video Captions available (CC)
Video Captions available (CC)
Video Captions available (CC)
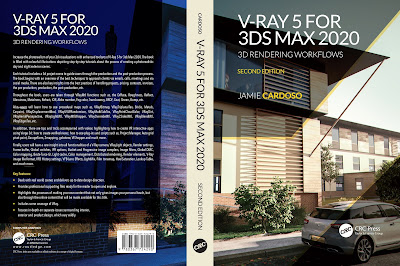
Finally, I have just published a New Book with Taylor & Francis/CRC Press, entitled,
V-Ray 5 for 3ds Max 2020: 3D Rendering Workflows
Click on the image below to find out more about my new book.
Checkout below my other Courses with High Resolution Videos, 3d Project files and Textures included.
 |
| Course 1: Exterior Daylight with V-Ray + 3ds Max + Photoshop Course 2: VRay 3ds Max Interior Rendering Tutorials |
 |
| Course 3: Exterior Night with V-Ray + 3ds Max + Photoshop |
 |
| Course 4: Interior Daylight with V-Ray + 3ds Max + Photoshop |
 |
| Course 5: Interior Night with V-Ray + 3ds Max + Photoshop |
 | |||||
Course 6: Studio Lights with V-Ray + 3ds Max + Photoshop
|
My 3D Portfolio:
New Book: 3D Photorealistic Rendering: Interiors & Exteriors with V-Ray and 3ds Max
More tips and Tricks:
Post-production techniques
Tips & tricks for architectural Visualisation: Part 1
Essential tips & tricks for VRay & mental ray
Photorealistic Rendering
Creating Customised IES lights
Realistic materials
Creating a velvet/suede material
FoxRenderfarm
www.arroway-textures.com
Renderpeople
Gobotree
.


simple but really needed.. thanks..
ReplyDeleteVery good, thanks for that.
ReplyDeleteNow, it would be interesting, a solution to attach lines by color.
And if weld the vertices, even better.
This makes the file much smaller, and the viewport is super lightweight.
My small contribution.
ReplyDeleteTo change once for all this tedious problem you just need this code saved in maxroot > scripts > startup directory. Works when you import or link CAD files
--------------------
callbacks.removeScripts id:#rw
fn restoreWirecolor =
(
undo off with redraw off
(
for o in objects where o.colorByLayer do
(
o.colorByLayer = off ; o.wirecolor = o.layer.wirecolor
)
)
)
callbacks.addScript #fileLinkPostAttach "restoreWirecolor()" id:#rw
callbacks.addScript #postImport "restoreWirecolor()" id:#rw
----------------------------------
my recent maxscript tools
http://www.scriptspot.com/users/barigazy
Hi Wilian,
ReplyDeletehere we go:
http://www.sendspace.com/file/90462p
Just drag and drop script in max viewport.
Adjust weld threshold and press Attach... button. No need to select anything in the scene because script works on geometry (E-Poly and E-Mesh) and Splines.
Best regards!
Branko
Hi All,
ReplyDelete"The Pharaoh10" and "Wmiler Wilian": Thank you very much for your feedback here. I really appreciate it!!!
Barigazy: A Big KUDOS for your continuous input/support on this post!!!!
Ta
Hi Jamie,
ReplyDeletewhat can I say ...
My pleasure. :)
http://www.scriptspot.com/3ds-max/scripts/dwg-cleanup
ReplyDeleteCorrected bug of "Attach and Weld By Wirecolor" script http://www.sendspace.com/file/1jdet5
ReplyDelete